⚙️ Configure Notification
Before sending notifications to your users, you need to configure each notification type in your NotificationAPI dashboard. This process involves creating a notification type and selecting which channels will deliver your notifications.
Overview
Configuring a notification is a crucial step that defines:
- Title - A human-readable name for easy management
- Unique Type ID - A unique identifier for your notification type that’s auto-generated from the title
- Delivery Channels - Which channels (Email, SMS, Push, etc.) will send this notification
- Channel Settings - Individual configuration for each selected channel
Think of notification configuration as creating a “blueprint” for your notification type. Once configured, you can send notifications using the type ID from your application code.
Creating Your Notification
Step 1: Set Notification Details
When creating a new notification, you’ll start by defining the basic details:
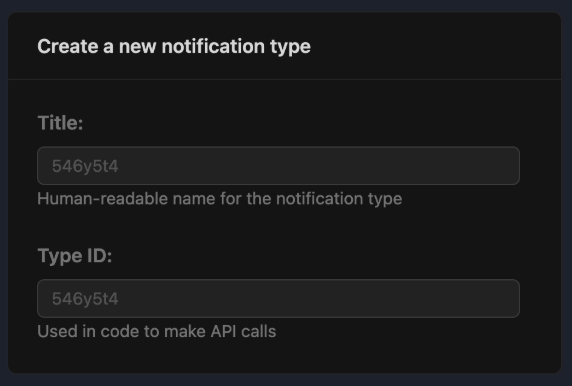
Notification Title
The Title field is a human-readable name that helps you identify and manage your notifications in the dashboard. This will be automatically generated based on the notification title.
Examples:
- “Welcome Email”
- “Password Reset”
- “Order Confirmation”
- “Weekly Digest”
- “Payment Failed Alert”
Unique Type ID
The type ID is a unique identifier that your application will use when sending notifications through the API. This ID becomes part of your code, so choose it carefully.
Purpose of the Type ID:
- API Integration - Used in your API calls to specify which notification to send
- Template Management - Links to specific templates for each channel
- Analytics & Tracking - Helps track performance and delivery metrics
- User Preferences - Allows users to manage preferences per notification type
Examples:
welcome_emailpassword_resetorder_confirmationweekly_digestpayment_failed_alert
Step 2: Select Delivery Channels
After setting your notification details, you’ll choose which channels will deliver your notification:
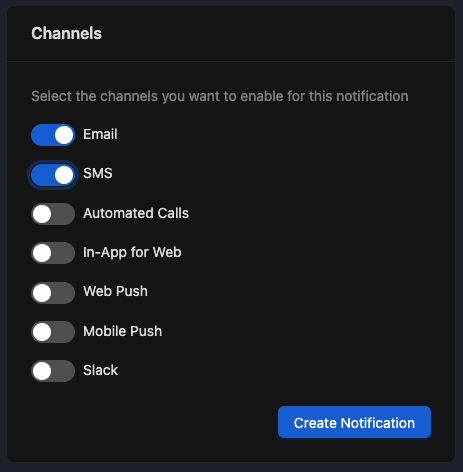
Available Channels
NotificationAPI supports multiple delivery channels, each with its own strengths:
- Rich content with HTML formatting
- Attachments and embedded images
- High deliverability and reliability
- Perfect for detailed information and receipts
📱 Mobile Push
- Instant delivery to mobile devices
- High visibility and engagement
- Great for time-sensitive alerts
- Requires mobile SDK integration
🌐 Web Push
- Browser-based notifications
- Works across desktop and mobile browsers
- No app installation required
- Ideal for web application users
💬 SMS
- Direct and immediate delivery
- Universal device compatibility
- High open rates
- Best for urgent, infrequent, short messages
📞 Automated Calls
- Voice delivery for critical alerts
- Accessibility-friendly option
- Immediate and attention-grabbing
- Perfect for emergency notifications
💬 In-App Web
- Real-time notifications within your application
- Rich interactive content
- Seamless user experience
- Great for feature announcements and updates
💬 Slack
- Team and workspace notifications
- Integration with business workflows
- Threaded conversations
- Ideal for team updates and alerts
Selecting multiple channels doesn’t mean all users will receive notifications on all channels. Users can customize their preferences for each notification type through their preference settings.
Using Your Configured Notification
After configuration, you’ll use the type ID in your application code:
// Example API call using your type ID
await notificationapi.send({
  type: 'welcome_email', // Your configured type ID
  to: {
    id: 'user123',
    email: 'user@example.com'
  },
  parameters: {
    firstName: 'SpongeBob',
    company: 'Square Pants Corp'
  }
});
The API will automatically:
- Send to all configured channels
- Apply user preferences
- Use the appropriate templates
- Track delivery and engagement
Next Steps
After configuring your notification: